As a content creator, the comments section on your YouTube channel is an excellent way to engage with your audience. However, with the influx of comments, there can be some unwanted comments that need to be moderated. This is where comment moderation comes in handy. In this article, we will go through the step-by-step process of enabling comment moderation on your YouTube channel.
The comments section on YouTube is a great way to build a community and interact with your audience. However, to get more youtube comments that can come in, it’s important to moderate them to ensure that your channel stays a positive and safe space for everyone. In this article, we’ll guide you through the steps to enable comment moderation on your YouTube channel and provide some best practices for managing comments effectively.
What is Comment Moderation?
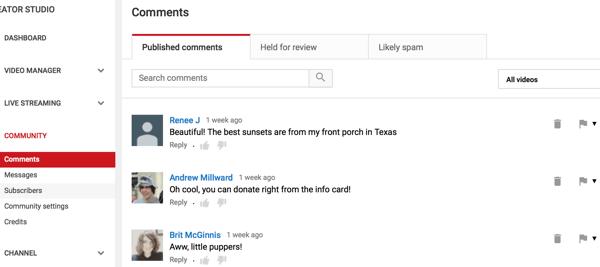
Comment moderation is the process of reviewing and approving comments on your YouTube channel. This feature allows creators to remove any inappropriate or spammy comments and ensure that their channel remains a positive space for discussion.
Benefits of Comment Moderation
Enabling comment moderation can provide several benefits for your YouTube channel. Some of the most significant benefits are:
- Reduced spam: Comment moderation helps prevent spammy comments from cluttering up your channel and annoying your viewers.
- More meaningful discussions: By removing inappropriate or irrelevant comments, you can encourage more meaningful discussions on your channel.
- Increased engagement: When viewers see that you are actively moderating comments and engaging with your audience, they are more likely to engage with your content.
How to Enable Comment Moderation on Your YouTube Channel
Enabling comment moderation is a simple process that can be done in just a few steps. Here’s how:
Step 1: Sign in to YouTube
First, sign in to your YouTube account.
Step 2: Go to Your Channel Dashboard
Next, go to your channel dashboard by clicking on your profile picture in the top-right corner of the screen and selecting “YouTube Studio.”
Step 3: Click on the “Settings” Tab
In your channel dashboard, click on the “Settings” tab on the left-hand side of the screen.
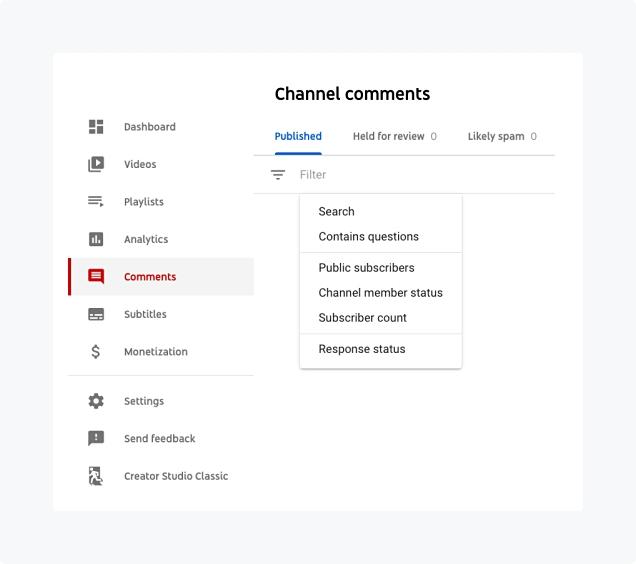
Step 4: Click on the “Community” Tab
In the settings menu, click on the “Community” tab.
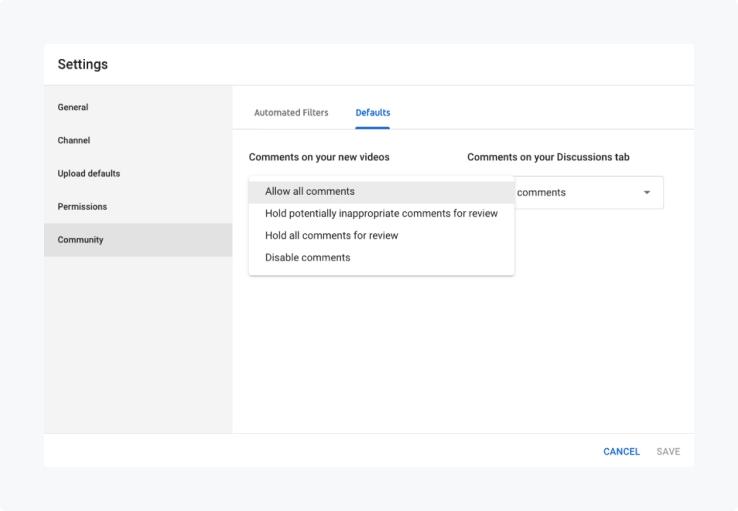
Step 5: Enable Comment Moderation
Finally, enable comment moderation by toggling the switch next to “Hold potentially inappropriate comments for review” to the “On” position. You can also choose to automatically block certain words and phrases in the “Blocked Words” section.
And that’s it! Your comment moderation settings are now enabled.
Best Practices for Comment Moderation
Now that you’ve enabled comment moderation on your channel, it’s important to follow some best practices for managing comments effectively. Here are a few tips:
Be Consistent
Be consistent in your approach to comment moderation. Establish clear rules and guidelines for what is acceptable and what isn’t, and apply them consistently across all comments.
Respond to Comments
Engage with your audience by responding to their comments, especially if they are asking questions or offering feedback. This can help build a stronger community around your channel.
Conclusion
Enabling comment moderation on your YouTube channel is an essential step in managing your comments and maintaining a positive space for discussion. By following the steps outlined in this article and implementing best practices for comment moderation, you can create a more engaging and respectful community around your content.